Maintaining your vape coil is essential for optimal performance. Knowing how to clean a vape coil properly can enhance your vaping experience significantly. Dirty coils can lead to burnt flavors and reduced vapor production. Therefore, a regular cleaning routine is crucial for every vaper.
Cleaning a vape coil might seem simple, but it often requires attention to detail. Many users overlook this essential maintenance. The buildup of residue can affect flavor and overall satisfaction. When focusing on how to clean a vape coil properly, one must consider various methods. Some people prefer soaking in alcohol, while others opt for warm water. Each method has its pros and cons.
Additionally, it's important to recognize that not every coil can be cleaned effectively. Some coils may need replacing after a few uses. Reflecting on your practices helps you determine the most effective cleaning schedule. Ensuring your coil is clean not only optimizes performance but also prolongs its lifespan.
Keeping your vape coils clean is essential for optimal performance. Over time, residue builds up, impacting flavor and vapor quality. According to a 2022 industry report, 75% of vapers experience a drop in performance due to dirty coils. This highlights the importance of regular maintenance.
Cleaning your coils can greatly enhance the lifespan of your device and the quality of your experience. A study by the Vaping Research Group found that users who cleaned their coils reported a 30% improvement in flavor. This is because clean coils allow for better e-liquid absorption, resulting in thicker vapor and a more enjoyable hit.
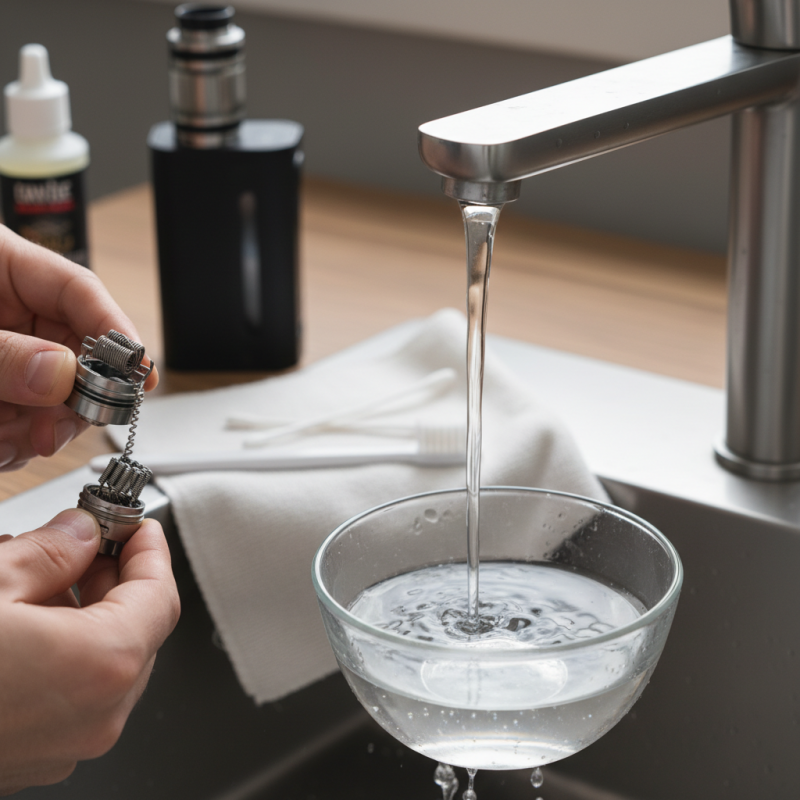
Tips for Cleaning Vape Coils:
Use distilled water or a specialized cleaning solution. Soak coils for at least 30 minutes. Rinse thoroughly and let them dry completely before reassembly.
Remember, even with cleaning, some coils may still lose flavor permanently. Regular checks are crucial for maintaining peak performance.
When cleaning a vape coil, having the right materials is crucial. You will need basic supplies like distilled water, cotton swabs, and a small bowl. Distilled water is preferred because it prevents mineral buildup. This is key for maintaining optimal performance. You might also want alcohol wipes to remove stubborn residues. A soft brush can help reach those hard-to-clean areas.
Gathering a few paper towels is wise as well. They will absorb excess liquids and keep your workspace tidy. Some users find that using a small syringe is helpful for applying cleaning solutions more effectively. Remember to have patience, as coil cleaning can be a meticulous process.
As you clean, reflect on how often you perform maintenance. Regular cleaning can extend coil life. However, if not done carefully, you risk damaging the coil. Pay attention to details while cleaning, and don’t rush. This will yield better performance and can even improve flavor.
Cleaning your vape coil is essential for maintaining the best performance. Over time, coils can accumulate residue and flavor that hinder your vaping experience. A clean coil provides better flavor, vapor production, and overall satisfaction.
Start by disassembling your vape device. Remove the tank to expose the coil. Rinse the coil under warm water to remove larger debris. For deeper cleaning, soak the coil in a solution of warm water or vinegar. Let it sit for about 10-15 minutes. After soaking, rinse it again. Dry the coil thoroughly before reassembling your device. It’s important to check for any signs of damage. A worn-out coil needs replacement, despite your cleaning efforts.
Repeatedly cleaning your coil can be effective, but don't expect perfection. Sometimes, stubborn residues might remain. If the flavor is still lacking, it might be time to buy new coils. Experiment with different cleaning methods to see what works best for your situation. Each cleaning experience can teach you something new, helping you improve your overall approach.
| Step | Action | Materials Needed | Duration |
|---|---|---|---|
| 1 | Remove the Coil from Device | None | 2 minutes |
| 2 | Soak the Coil in Alcohol | Isopropyl Alcohol | 10 minutes |
| 3 | Rinse with Water | Distilled Water | 5 minutes |
| 4 | Dry the Coil | Paper Towel | 5-10 minutes |
| 5 | Reassemble and Test | None | 2 minutes |
Cleaning vape coils is crucial for optimal performance. However, there are common mistakes many users make during this process. One mistake is using tap water. Tap water can contain minerals that leave residue. Instead, use distilled water for a clean rinse.
Another frequent error is not allowing the coil to dry completely. A damp coil could lead to a burnt taste when vaping. Make sure to give it ample time to dry. Rushing this step can ruin your vaping experience.
Overlooking the importance of a gentle approach is also a mistake. Scrubbing too harshly can damage the coil. Instead, lightly brush with a soft toothbrush. This preserves the coil's longevity while ensuring a thorough clean. Each step is vital for maintenance.
Keeping your vape coil in top shape is essential for an enjoyable vaping experience. After cleaning, it’s crucial to follow specific tips to maintain its performance. Start by allowing your coil to dry thoroughly before reassembling your device. This step is vital. If any moisture remains, it can lead to uneven heating and burnt flavors.
Regular replacement is another key factor. Even with proper cleaning, coils wear out over time. Monitor your coil’s flavor and cloud production. If you notice a decrease, it might be time for a change. Using the right e-liquid also helps. High-VG liquids can leave residue more quickly, requiring more frequent maintenance. Opt for blends that suit your coil type for better longevity.
Keep your vaping environment in check. A clean area minimizes contamination. Watch for signs of buildup, especially around the coil's base. Regular inspections can prevent unexpected issues. Don’t overlook the importance of proper wattage settings. Too high can cause damage, too low can lead to poor flavor. Finding the perfect balance is often a process of trial and error.
: Cleaning vape coils enhances performance and flavor by removing built-up residue.
Regular cleaning is crucial. Check coils often for optimal performance.
Soak coils in distilled water for 30 minutes, then rinse and dry thoroughly.
No, tap water may leave minerals. Always use distilled water for best results.
If flavor does not improve after cleaning or visible damage is present, replace the coil.
Soak coils for about 10-15 minutes for a proper clean.
Avoid scrubbing too hard or not letting coils dry completely after cleaning.
Yes, regular cleaning can extend the lifespan of your device and improve usage experiences.
If the flavor is still lacking, it might be time to buy new coils.
Yes, trying different methods can help find the most effective approach for your coils.
Proper maintenance of vape coils is essential for optimal performance, making it crucial to know how to clean a vape coil properly. This process involves understanding the importance of cleanliness in achieving better flavor and vapor production. To effectively clean your vape coil, you'll need specific materials such as warm water, isopropyl alcohol, and a cotton swab.
A step-by-step guide helps you execute the cleaning process, ensuring all residues are removed. It’s important to be mindful of common mistakes like excessive scrubbing or using harsh chemicals that could damage the coil. After cleaning, maintaining your vape coil's performance involves regular checks and proper storage. By following these guidelines, you’ll prolong the life of your vape coils and enhance your vaping experience.
Leaf Vape